Introduction to the Floating Marker Science Experiment
Scientific exploration often begins with simple observations and everyday objects. One of the most visually captivating demonstrations we can perform with minimal materials is the floating marker experiment, a creative activity that reveals the fascinating properties of surface tension, hydrophobic ink, and molecular interactions in water.
Using an ordinary dry-erase marker, a bowl of water, and a smooth surface, we can create floating drawings that detach from their original surface and drift freely across the water. The effect appears almost magical: shapes, stick figures, or letters seem to lift themselves from the surface and float like tiny rafts.
This experiment is ideal for classrooms, science demonstrations, and home learning activities because it combines simplicity with a striking visual result. It introduces key scientific concepts while encouraging observation, curiosity, and creativity.
Components Required for the Floating Marker Experiment
Before beginning the demonstration, we prepare all materials carefully to ensure a smooth and successful experiment.
Primary Components
- Dry-erase marker (black or colored)
- Ceramic plate or smooth glass surface
- Clean bowl or tray filled with water
- Paper towels for cleanup
Optional Materials for Enhanced Experiments
- Multiple colored dry-erase markers
- Plastic spoon or pipette
- Drop of liquid soap
- Flashlight or strong desk lamp
- Transparent container for better observation
Each component plays a specific role in producing the floating ink phenomenon that makes this experiment so remarkable.
Preparing the Experiment Setup
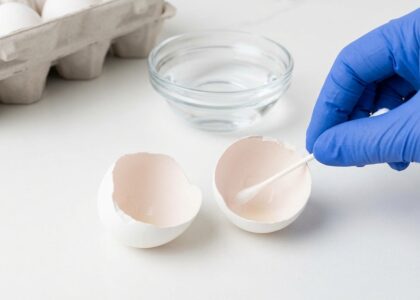
We begin by selecting a smooth, non-porous surface such as a ceramic plate or glass dish. This type of surface is essential because it prevents the ink from permanently bonding to the material.
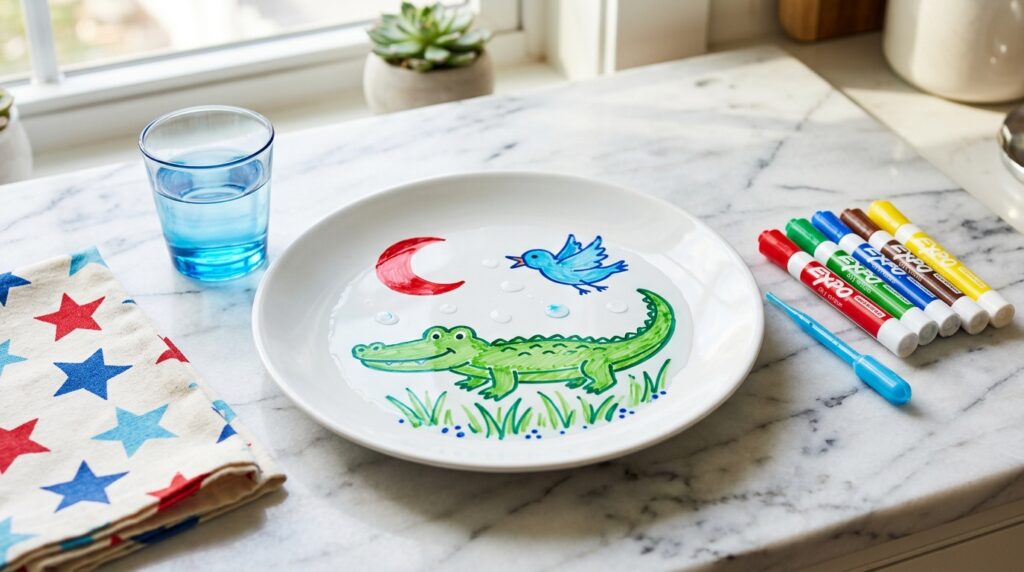
Next, we draw a simple figure on the plate using the dry-erase marker. Common examples include:
- Stick figures
- Stars
- Arrows
- Hearts
- Letters or numbers
The drawings should be bold and clearly defined, as thicker lines detach from the surface more easily.
Once the drawing is complete, we prepare a bowl of clean water. The water should be room temperature and deep enough to fully submerge the plate if necessary.
Performing the Floating Marker Experiment
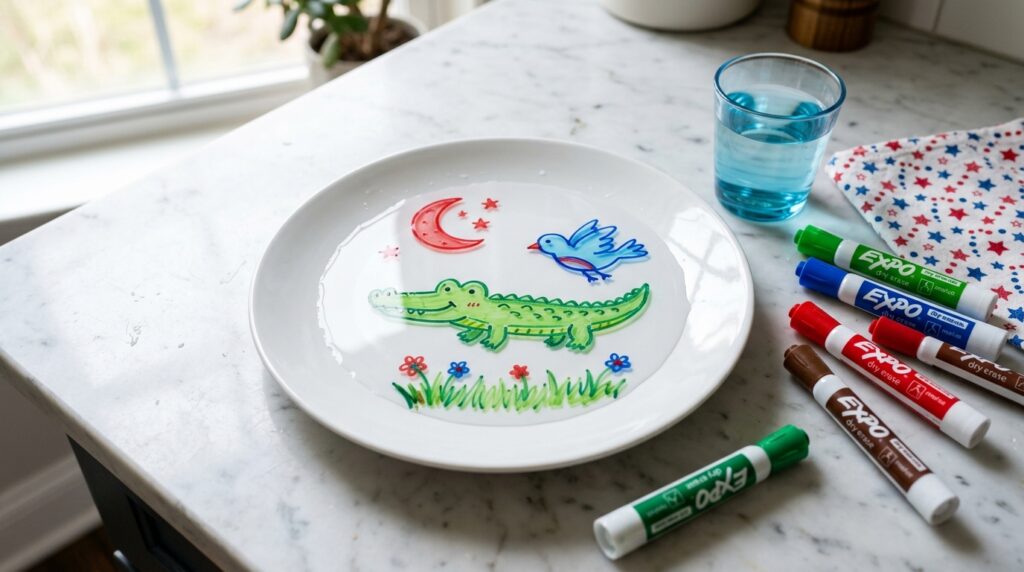
The key moment occurs when we slowly tilt the plate into the bowl of water.
As the plate enters the water at a shallow angle, something remarkable happens: the ink drawing detaches from the plate and begins to float on the surface of the water.
The drawing remains intact and moves freely, gliding across the surface like a miniature floating illustration.
Children and observers often react with amazement as the figure appears to lift itself off the plate and come to life on the water.
If the plate is gently moved, the drawing may even drift and rotate, creating the illusion that it is animated.
Surface Tension and the Floating Ink Effect
The floating marker experiment demonstrates the powerful effect of surface tension, a property that allows the surface of water to behave like a flexible film.
Water molecules attract one another strongly. At the surface, this attraction creates a thin layer that can support lightweight materials, including detached ink.
Dry-erase marker ink contains compounds that are less dense than water and hydrophobic, meaning they repel water. When the drawing separates from the plate, the ink remains intact and is supported by the surface tension of the water.
This combination of hydrophobic ink and strong surface tension allows the drawing to float without dissolving immediately.
Observing Movement and Interaction
Once the drawing floats freely, the experiment becomes even more interesting.
By gently tapping the bowl or blowing lightly across the surface, we can cause the drawing to glide and spin across the water.
Adding multiple drawings allows us to create floating shapes that interact with one another.
Some creative experiments include:
- Drawing multiple fish shapes that appear to swim
- Creating floating letters that form words
- Designing arrows that move across the surface
This dynamic movement transforms the experiment into an engaging visual demonstration of physics and chemistry.
Adding Soap to Transform the Experiment
The experiment can be expanded further by introducing a drop of liquid dish soap.
When a small drop of soap touches the water near the floating drawing, the shape often breaks apart instantly or rapidly moves away.
Soap reduces the surface tension of water by disrupting the molecular attraction between water molecules. As a result, the delicate floating structure loses support and disperses.
This dramatic change highlights the importance of surface tension in maintaining the floating ink structure.
Creative Variations of the Floating Marker Experiment
We can extend the experiment with a variety of creative approaches that make it even more engaging.
Animated Floating Characters
Draw a stick figure with arms and legs. When the plate is placed in water, the figure appears to dance or glide across the surface.
Colorful Floating Designs
Use several marker colors to create multi-colored shapes. When released into the water, these designs produce vibrant floating patterns.
Floating Maze Experiment
Draw a simple maze and release it onto the water. Then place a tiny paper dot inside the maze and observe how the floating structure moves.
Floating Word Messages
Write short words such as HELLO or SCIENCE. Watching the letters detach and float together creates a striking effect.
These variations transform the experiment into an artistic exploration of science.
Educational Value of the Floating Marker Experiment
This demonstration offers several educational benefits that make it ideal for teaching scientific principles.
Understanding Surface Tension
Students observe firsthand how the surface of water can support objects and maintain structure.
Exploring Hydrophobic Materials
The experiment introduces the concept of water-repelling substances, which play important roles in many real-world applications.
Encouraging Scientific Observation
Participants can experiment with different variables, including:
- Marker thickness
- Water temperature
- Surface materials
- Drawing complexity
Each variation produces unique results that encourage deeper exploration.
Tips for Achieving the Best Floating Marker Results
To create the most impressive floating drawings, we follow several practical tips.
- Use fresh dry-erase markers for strong ink lines
- Draw thick outlines rather than thin sketches
- Tilt the plate slowly into the water
- Avoid shaking the container
- Use smooth ceramic or glass surfaces
These small adjustments significantly improve the clarity and stability of the floating shapes.
Expanding the Experiment into a Classroom Demonstration
In classroom settings, this activity can be expanded into a full science demonstration or group experiment.
Students can work in teams to design their own floating illustrations and test different variables.
Possible investigation topics include:
- Which marker colors float best
- How soap affects surface tension
- How water temperature changes results
- Which surfaces release ink most easily
By recording observations and comparing results, students practice scientific thinking and experimental analysis.
Applications of Surface Tension in Everyday Life
The floating marker experiment connects directly to many real-world scientific phenomena.
Surface tension influences:
- Water droplets forming on leaves
- Insects walking across ponds
- Soap breaking grease on dishes
- Ink behavior in printing technology
Understanding this property helps explain how liquids behave in both natural environments and modern technology.
Conclusion: A Simple Experiment with Remarkable Scientific Impact
The floating marker experiment demonstrates how simple household materials can reveal powerful scientific principles. By drawing a shape on a smooth surface and gently introducing it to water, we witness the surprising moment when ink detaches and floats effortlessly across the surface.
Through this engaging demonstration, we explore surface tension, hydrophobic materials, and molecular interactions in a way that is both visually captivating and educationally meaningful.
With minimal preparation and endless creative possibilities, the floating marker experiment stands as a perfect example of how science can transform ordinary objects into extraordinary discoveries.